Levelling a Floor: A Simple Fix for Uneven Floors
When replacing or installing a new floor, you want to ensure that the surface is flat for a sleek look.
This will prevent gaps, cracks, and sloping, enhancing the quality of your floor. No matter what style you decide on, this is an essential step for a quick and easy installation.
Read on for our simple guide to levelling your floor, ideal for beginners and professionals alike.
What Causes Uneven Floors?
Over time, a foundation can shift or settle, causing uneven floors.
Flooding and frequent moisture exposure can also cause floors to become uneven. This can be caused by installing an unsuitable flooring option in a bathroom or kitchen. Rushed construction work can also result in improper levelling.
This can lead to potential safety hazards, such as tripping for young children and elderly residents. Additionally, this affects the overall appeal of your home, impacting its value.
Necessary Tools
- Levelling compound
- Primer
- Trowels and spreaders
- Mixing tools
- Spirit level or laser level
- Utility knife
- Measuring and marking tools
- Bucket of water
- Brush and vacuum
PPE: It’s important to wear protective gear such as gloves and safety goggles to prevent accidents and injury.
Preparing for the Levelling Process
- Clear the area: Move any furniture or decor which obstructs the floor. Open all windows and doors for efficient ventilation.
- Measure the area: Measure the size of the area using a spirit level. Mark the areas with a pencil or chalk as a reference. Measure the depth of the dips or rises to estimate the amount of levelling compound needed.
- Clean the floor: Brush any debris off the floor, ensuring it is dry before beginning the levelling.
- Inspect the subfloor: Inspect the subfloor for any cracks, chips, or protruding nails. Repair the damaged areas and apply primer before levelling the floor.
A Step-by-Step Guide to Levelling a Floor
Now that you’ve prepared the floor. It’s time to dive into the levelling process:
- Mix the levelling compound: Using the manufacturer’s instructions, mix the compound in a bucket with water for a lump-free consistency. Work in small batches to prevent it from setting too quickly.
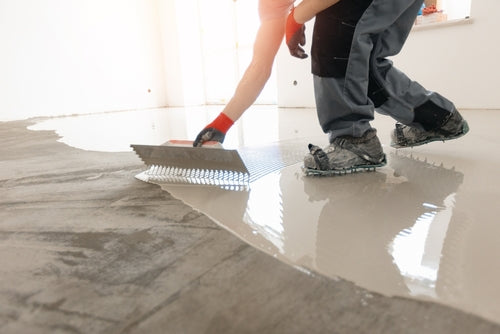
- Apply the levelling compound: Start at one corner of the room and pour the compound onto the uneven areas. Use a trowel or spreader to smooth down the compound in the gaps. Use your tools to guide the compound into low, unreachable spots.
- Check for evenness: Then, use the level to check for any remaining uneven surfaces. Repeat the process if necessary.
- Allow the floor to set: Leave the floor to dry, following the manufacturer's recommendations for the compound. Avoid walking on the floor until it’s completely dry to prevent damage.
- Final preparations: Check the level of the floor once it's dry. Use a sanding method to smooth out any imperfections.
Choose Mersey Flooring for Your New Floor
Now that you have a brand-new smooth surface, it’s time to upgrade your flooring. Whether you prefer a traditional herringbone style or a sleek vinyl look, we have everything you need at Mersey Flooring.
Browse our products today or contact our expert team for professional help and advice. With free delivery and low prices, you can’t go wrong with Mersey Flooring.