A Guide to Removing Old Floor Tiles
Are you tired of your worn-out-looking tiles? Is it time for a replacement? If so, our easy guide will help you remove your old tiles as quickly and efficiently as possible.
You don’t need to be a professional to get the job done. At Mersey Flooring, you can create a brand-new luxurious appearance for your home with our laminate, vinyl, tile-effect flooring and more!
Our tile-effect floors are the perfect way to re-create that classic tile look without putting a dent in your wallet. Read on for an easy guide to removing tiles.
How to Prepare for the Removal
Before starting any construction work, it’s necessary to clear the area of any obstructions and wear the appropriate PPE. This includes safety glasses, gloves, and a mask to prevent inhaling harmful debris.
Place plastic covers over any surrounding furniture to protect them from damage. It's also important to power off any electrical outlets in the room to prevent the risk of electrical hazards.
For adequate ventilation, open all the windows and doors in the room. This will allow any chemicals to evacuate the area.
Tools and Materials
To remove your old floor tiles, you will need to gather the following:
- Hammer
- Cold chisel
- Pry bar
- Floor scraper
- Grout saw
- Pencil or marker
- Tape measure
- Sledgehammer (optional)
- Hammer drill (optional)
- Oscillating tool (optional)
A Step-by-Step Guide to Removing Your Tiles
Now that you’re prepared, it’s time to get into it:
1. Choose your starting point
Start at the edge of the room, as these tiles are easier to remove.
Then, using your hammer and chisel, position the chisel at the edge of the tile and gently knock the top of the chisel with the hammer to start loosening the tile.
2. Remove the tile grout
Using a grout saw, run the tool along the lines of the grout to remove the material.
This will make it easier to lift the tiles. Be careful when doing this so as to not damage the subfloor.
3. Continue loosening the tiles
Once you have loosened the first tile, slide the chisel underneath the edge and apply firm pressure with your hammer to gently lift the tile.
If the tile won’t budge, break it into smaller pieces with a sledgehammer or hammer drill. Continue this process with each tile, starting from the edge and moving into the centre.
Proceed with caution to prevent damaging the subfloor.
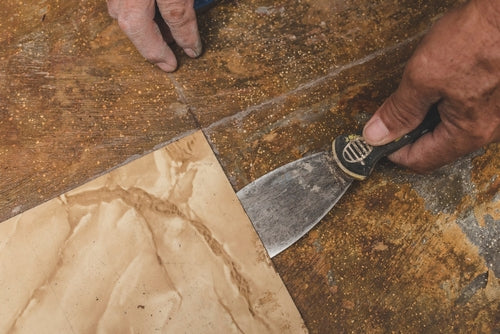
4. Removing tiles with adhesive
For tiles that have been glued down with a strong adhesive, remove them with a floor scraper.
Put some force into the removal to get rid of the adhesive. Once the tile has lifted, use the chisel or a pry bar to completely remove it.
If adhesive remains on your subfloor, slide the chisel underneath it to remove it. For stubborn adhesive, use a hairdryer or heat gun to soften it beforehand for easier removal.
5. Clean the subfloor
Once all the tiles have been removed, you will need to clean your subfloor.
Use a vacuum or brush to clear away any debris and remove any plastic protection covers. Inspect the subfloor to see if any repairs are necessary.
Browse Our High-Quality Tile-effect Floors
Why pay the cost of real tile when you can have durable tile-effect flooring?
With our tile-effect floors, you don’t have to worry about cracks or frequent maintenance and repairs. This is designed to prevent scratching and has great moisture resistance for bathrooms and kitchens.
To purchase our tile-effect floor or find out more information, browse our options today or contact us for professional advice.