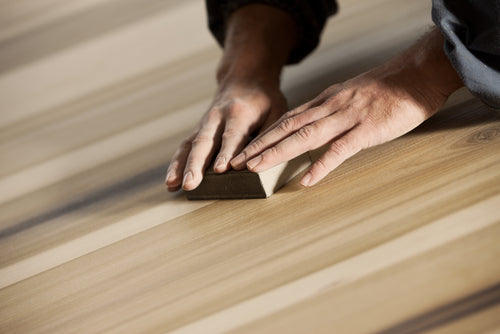
A Guide to Sanding Engineered Wood Flooring
Engineered wood is a popular choice for many floors. Its sleek and elegant design transforms any home from plain and dull to beautiful and luxurious.
If you want to sand your engineered flooring to achieve a smooth and polished look, we have created an easy guide to help you through the process.
You don’t have to be a professional to get the job done. Read on below to find out how and browse our flooring products whilst you’re here.
When Is Sanding Necessary?
Sanding engineered wood is not a task that needs to be completed frequently. However, various factors might indicate that your floor needs sanding:
- Wear and tear: When the wear layer becomes significantly damaged or worn, it can compromise the aesthetics and require sanding to restore its original look.
- Stains and discolouration: Sanding can help remove deep stains and discolouration.
- Refinishing: Sanding removes the existing finish, preparing the surface for a new finish or stain.
- Uneven surface: Sanding can level the surface of your floor, removing imperfections for a polished look.
- Water damage: If your engineered floor has water damage, such as cupping, warping, or swelling, sanding may be necessary to restore it.
Sanding Techniques
There are various sanding techniques and tips to achieve your desired look. Following these techniques will ensure that the structural integrity of your floor remains intact whilst providing a seamless finish.
Tools Needed
- Orbital sander
- Drum sander
- Edge sander
1. Coarse Grit
- Start by using coarse grit sandpaper on the drum sander to remove any existing imperfections.
- Then, work in straight lines, going with the grain of the wood steadily to avoid uneven sanding.
- Overlap each pass slightly to ensure even coverage.
2. Progress to Finer Grits
- Once you have finished with coarse grits, move to finer grits, such as medium, fine, or extra fine.
- Each successive pass should be done in a direction perpendicular to the previous pass to remove any leftover scratches.
- To avoid cross-contamination of grits, thoroughly clean the floor after each technique.
3. Edge Sanding
- Use an edger to sand the areas along the walls and corners where the drum sander cannot reach.
- Keep the edger moving and blend the edge-sanded areas with the rest of the floor to avoid uneven flooring.
4. Hand Sanding
- Hand sanding may be necessary to remove small imperfections or to feather the edges.
- For this, use a sanding block or a hand-held orbital sander and fine-grit sandpaper for a smooth application.
5. Final Sanding
- Finish with a very fine-grit sandpaper for a silky-smooth surface.
- Ensure the sandpaper and the floor are clean to prevent particles from getting trapped in the finish.
- Then, vacuum and mop the area to remove dust and debris.
Sanding the Edges and Corners
Sanding the edges and corners of your floor can be more difficult than sanding the main area. For your convenience, we have listed some tips and guidelines for sanding the edges of your engineered wood flooring.
Tools Needed
- Edge sander
- Orbital Sander
- Edge-sanding attachment
Sanding Technique
- Starting with a medium-grit, attach the grit sandpaper to the edge or oribtal sander. Progress to finer grits if needed.
- When sanding the edges, position the machine at a slight angle so the sanding surface touches the floor and the wall. This will avoid creating grooves or gouges.
- Work in small sections at a time, moving the machine steadily along the edge.
- You may need to switch to a smaller hand-held sander or sanding block to reach tight corners.
Feathering
- To achieve a seamless transition between the edge-sanded areas and the main floor, you'll need to feather the edges.
- To do this, use fine-grit sandpaper to lightly sand the area where the edge-sanded portion meets the rest of the floor.
- This blends the floor, ensuring no noticeable transitions or ridges.