A comprehensive guide on engineered wood flooring installation
Engineered wood flooring is the perfect choice for people who wish to have the real look of wood floors without putting a large dent in their wallet. For a great price, you can have all of the benefits of traditional wood floors, as well as extra sustainability and longevity. What could be better?
A DIY installation can also reduce the overall cost of your home improvement project. Stick with us for an in-depth guide to installing engineered wood flooring. Anyone can do it!
Browse our range of engineered wood flooring today and get your worker's cap on.
Tools and Materials
Before we begin, it is vital to list the necessary equipment to complete the job efficiently.
- Tape measure
- Carpenters square
- Marking tool
- Circular saw, Jigsaw, table saw, and trim saw
- Nailer or stapler and adhesive
- Rubber mallet and tapping block
- Flooring spacers and pry bar
- Hammer and nail and finish nailer
- Utility knife
PPE: Safety glasses, knee pads, dusk mask, gloves.
Pre-installation preparation
Before we get into the installation process for engineered wood flooring, there are a few essential things we need to do to prepare.
-
Clear the room: Remove all furniture and obstacles from the room to provide a clean and unobstructed space to work in.
- Inspect the subfloor: Look for any signs of damage, unevenness, or moisture issues. Address any problems before proceeding for an efficient and smooth installation process.
- Clean the subfloor: Remove any dirt, dust, and debris from the subfloor to provide a solid base for the underlayment and flooring.
- Level the subfloor: Use a level to check for any uneven areas in the subfloor. Use a self-levelling compound to create a smooth surface if you notice any issues.
- Test for moisture: Use a moisture meter to test the subfloor's moisture levels, ensuring it is within the recommended range, around 7% to 9%. If it is above 12%, you must improve ventilation and apply a moisture barrier.
- Acclimate the planks: Allow them to acclimate to the room temperature they are being installed in for at least 48 hours before you begin. This will prevent the expansion or contraction of the planks after installation.
- Lay down the underlayment: Install the underlayment according to the manufacturer's instructions. Make sure it's properly secured and covers the entire subfloor. You can use adhesive or nails to secure the underlayment or use the floating floor method for an easier task.
- Measure and plan: Measure the room's dimensions and plan the layout of the planks, starting along the longest wall or near the main source of natural light.
How to install engineered flooring
Here is a step-by-step process for engineered floor installation that should be followed with safety precautions in mind. Make sure you have completed the previous prep beforehand.
Place down the first row
Before placing the first row of planks, place spacers around the edge of the room to create the required expansion gap. Then, you can begin to lay the planks, positioning the groove side against the wall.
Use your rubber mallet and a tapping block to gently fit the plank into place, ensuring it is positioned correctly.
Continue to install each row
For the next rows, insert each plank's tongue into the groove of the previous row at a slight angle to position the planks appropriately for a smooth, finished look. To look the planks together, use the rubber mallet and tapping block to knock them into place.
Use a spacer to ensure there is even spacing between each plank.
Cutting and staggering the planks
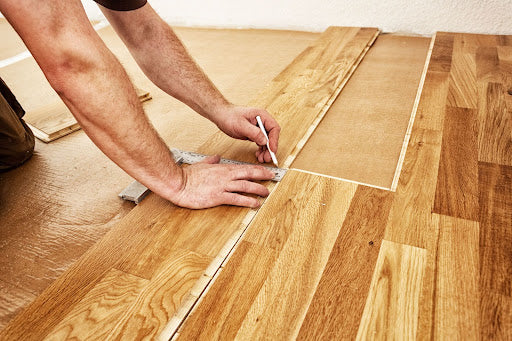
Using a tape measure and circular saw, measure and cut the planks to fit around the edges of walls for a more perfect finished product. Keep in mind the space you need for the expansion gap when cutting the flooring.
For doorways, trim the door casings to accommodate the height of the floor and use a jigsaw to make precise cuts to place your planks around obstacles within the space.
Stagger the end joints of the planks for a more appealing look for your home, adding style and sophistication.
Finishing the final row
You may need to cut your planks lengthwise to fit onto the final row. Remove the spacers next to the wall to finish the look and insert the last planks.
You can install baseboards and trims to conceal the expansion gap along the wall, using a finish nailer to securely attach the trim.
Make any necessary adjustments for the desired look and avoid heavy traffic on the floor for the next 24 hours to avoid damage to the structure.
Choose Mersey Flooring for your Engineered wood floors
Now that you are ready to install your new floor like a pro, browse our range of engineered flooring to find the perfect new addition to your home at an affordable price.
For more information about our products, email sales@merseyfloooring.co.uk or call us at 0151 525 4271. We look forward to hearing from you!