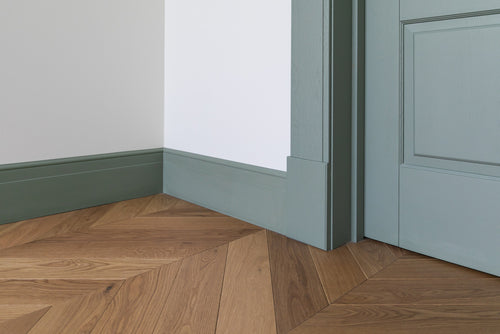
Everything You Need To Know About Fitting Skirting Board
Skirting boards are the perfect way to elevate a room, adding character and elegance. They can transform a simple, plain wall into something fun and appealing.
With our easy guide, you don’t need to be a pro or have any previous home design experience to carry out this process.
All you need is a can-do attitude and the right tools and equipment! Whilst you’re here, browse our skirting board products for the perfect look.
Choosing the Right Skirting Board
Choosing one option from a range of choices isn’t an easy task. You will need to decide which material and style will work best with your home's interior and your personal needs.
However, Mersey Flooring is here to simplify it for you. Follow these guidelines for an easy pick:
Types of Skirting Board
- MDF: Cost-effective, easy to work with, and comes in various designs.
- Pine: A softwood that is affordable and can be painted or stained.
- Oak: A hardwood option that offers durability and a premium look.
- Plastic/PVC: Waterproof and resistant to wear. Perfect for damp areas like bathrooms and kitchens.
Styles of Skirting Board
- Traditional: Features moulding and more intricate designs.
- Modern: Simple designs with minimalistic patterns and clean lines.
Size and Proportions
Consider factors such as room and ceiling height, and any existing decor or furniture in your home that may clash with or prevent an easy installation.
Opt for a thickness proportional to the height and surface of your wall. Incorporate extra length into your purchase to account for errors with cutting, room corners, and any damage to the skirting board.
The Tools and Materials You Will Need
- Mitre saw
- Tape measure
- Spirit level
- Hammer
- Coping saw
- Utility knife
- Adhesive gun
- Sanding paper
- Nails/screws
- Skirting board
- Wood filler
- Paint and primer
- Caulk
PPE: To remain safe, you will need safety goggles, ear protection, gloves, and a dusk mask to prevent injury or illness.
Preparing the Area
- Remove old skirting: Use a utility knife to cut the top and bottom edges of the skirting board. Then, insert the pry bar gently between the wall and skirting board to detach it. Use the claw hammer to remove any old nails or screws.
- Clean and prep the wall: Use a damp cloth with mild detergent to wipe down the wall. To remove mould or mildew, use 1 part bleach and 3 parts water. Remove any old wallpaper and chip any paint on the wall.
- Measuring and marking: Measure the total perimeter of the room to determine the total length you will need. Do this by measuring each wall separately and using a level to ensure that all horizontal lines are straight. Mark vertical lines where the skirting board will end, countering in corners for accuracy.
The Installation Process
- Cutting the skirting: Mark the direction of any angled cuts to avoid mistakes during cutting. Using a saw, measure the blade up with the lines and saw smoothly and steadily.
- Fitting Corners: For internal corners, attach the first square-cut piece, ensuring it is level and straight. Then, fit the coped piece tightly against the first, using adhesive or nails and checking for gaps. For external corners, cut both pieces at a 45-degree angle to meet seamlessly in the corner. Ensure they align perfectly, and attach both pieces using adhesive or fixings for a tight fit.
- Attaching the Skirting: Ensure the wall is dry and debris-free. Apply adhesive evenly along the back of the skirting board and align it with previous markings on the wall. For nails, attach them evenly along the skirting board and hammer them in place securely. Avoid placing them too close to the ends to prevent splitting.
- Sealing Edges: Use a utility knife to cut the caulk tube's tip at a 45-degree angle. Then, insert the tube into the caulking gun and apply caulk evenly along the edge where the skirting board meets the wall. Use a caulk smoother or a damp finger for a smooth finish, ensuring all gaps and joints are filled.