Can You Lay Vinyl Flooring Over Tile?
Most people don’t want to rip up old flooring before placing down a new one; it’s a time-consuming and strenuous process.
If you’re one of these people, then look no further; Mersey Flooring is here to help.
To put it simply, it is possible to lay vinyl flooring over tile as long as the surface is tightly sealed and flat. Read on to discover how!
The Benefits of Laying Vinyl Flooring Over Tile
Laying vinyl over tile has become increasingly popular. This is a cheap and durable option if you’re looking for a high-quality floor that is easy to install and maintain.
Cost-Effectiveness
Vinyl is typically less expensive than materials such as Hardwood and ceramic tile. This reduces its upfront cost, and installing it over existing tile eliminates the removal cost, making it a perfect option if you’re on a budget.
Ease of Installation
This process is perfect for a DIY job. With efficient tools and prep, you won’t need to spend on professional installation fees.
Low Maintenance
This type of floor can resist stains and water, making it perfect for kitchens and bathrooms. With an easy-clean surface, you will only need to mop and vacuum it occasionally.
If properly maintained, vinyl flooring can last up to 20 years as its wear layer prevents scratches and dents, making it a long-term investment.
Vinyl Flooring Suitable for Overlay
Here is a list of the best materials most suited for this type of job to make your decision easier:
- Luxury Vinyl Planks (LVP)
- Vinyl Sheet
- Peel and Stick Vinyl Tiles
How to Prepare the Tile Surface
Here is a brief overview of the necessary steps to take before getting stuck into your home project. A well-prepared surface ensures better adhesion and a smoother finish.
Materials and tools
- Vinyl flooring
- Underlayment (optional)
- Adhesive
- Primer
- Tile filler
- Fine-grit Sandpaper
- Trowel and Thin-set Mortar
- Utility knife
- Tape measure
- Straight edge square
- Paint Roller
- Spaces
Safety precautions: Make sure to wear safety goggles and a mask to avoid inhaling any debris and to avoid accidents. Wear gloves to protect yourself from any chemicals.
Clear and Prepare Damaged Tiles
Use a vacuum to remove any debris, and mop the floor using tile cleaner or warm water and mild detergent to get rid of grime in the crevices.
Use a tile filler to fill in any cracks or holes in the floor.
Level the Grout Lines
Use a thin-set mortar or a self-levelling compound to skim over the grout lines, creating a level surface.
Then, smooth out the skim coat using a trowel.
Sand the Surface
Lightly sand the tile surface to create a slightly rough texture to help the adhesive bond better.
Apply a Primer
Choose a primer that’s compatible with the materials you’re using, and evenly apply the primer to the surface using a paint roller.
Step-by-Step Guide to Laying the Vinyl
Now that you’re thoroughly prepared, you can get started on the installation!
Plan the Layout
Accurately measure the room using tape to determine how many planks you will need and decide on an arrangement for your floor.
Cut the Vinyl
Use a pencil and a straight edge to mark your measurements, and then cut the vinyl accordingly using a utility knife.
Apply the Adhesive
Mix your adhesive if required and then apply it to the surface of the tiles using a trowel, starting from one corner of the room to the other.
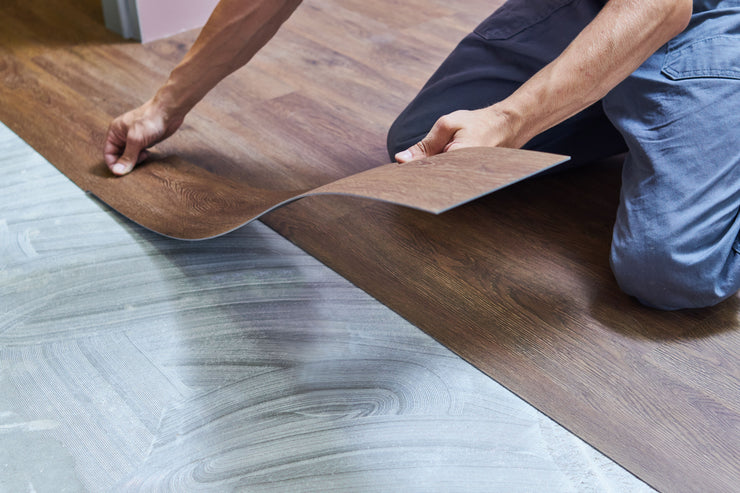
Lay the Vinyl
Align your vinyl properly and use spacers to place accurate and even gaps between each piece.
Use a roller or your hands to press the floor down, ensuring it sticks well to the tile. If there are any obstacles in the room, cut your pieces to fit around them.
Seal the Edges and Roll the Floor
Use a silicone sealant around the room's edges to prevent water from getting under the vinyl. Apply this with a spatula for a clean finish.
Then, roll the floor with a roller to ensure the floor is perfectly stuck in place.
Install Transitions and Trims
Measure and cut any trims you wish to apply and seal them in place, using nails or adhesive, to give the room a finished look.
Choose Mersey Flooring for your vinyl floor!
At Mersey Flooring, we stock high-quality products from leading brands, all ready to be shipped and installed in your home. Browse our range of vinyl flooring, perfect for home improvement.
We are happy to help out with any questions you may have. Visit our showroom or contact us today for more information.