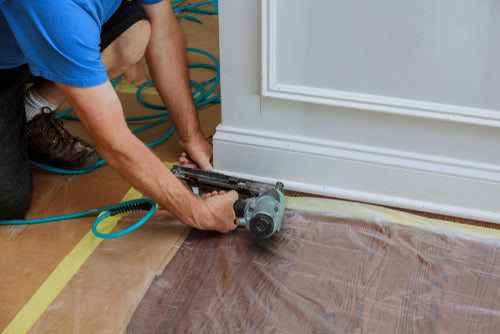
A Simple Guide to Fitting Scotia Trim
Scotia trim is a popular home improvement, installed to conceal gaps or seams along the edge of your wall.
Its aesthetic and functional purposes revive the appearance of your wall, creating a seamless and beautiful finish. This can prevent impact and moisture damage and reduce wear and tear.
If you want to add scotia trimming to your home, our simple guide will walk you through the process.
Browse our flooring products whilst you’re here for high-quality flooring and accessories.
Tools and Materials
Before you begin the process, you will need the following tools and materials:
- Scotia trim
- Measuring tape
- Mitre saw
- Coping saw
- Hammer and nails
- Adhesive
- Screwdriver or nail punch
- Wood filler
- Sandpaper or sanding block
- Pencil and marking tools
- Dust sheets
Safety: PPE is advised when performing construction work. This includes safety glasses, ear protection, a face mask, and safety boots.
Measuring and Planning
Using a measuring tape and a pencil, measure and mark the length of the walls and any corners, doorways, or features where the scotia will be installed.
Calculate the total length of scotia trim needed by adding the measurements of all the walls and corners where you will install it. Add a 10-15% extra to account for cuts and mistakes. If you require longer runs of Scotia trim, plan and position seams in less visible areas, such as corners.
Decide how you want to join the pieces of Scotia trim. You can use mitre joints, which require angled cuts or cope joints, which involve cutting one piece to fit the profile of the other.
Different types of floors will have different expansion gap requirements. Materials such as hardwood expand and contract due to humidity; therefore, a small expansion gap is required.
1. Cutting and Mitre Joints
- Cutting the first piece: Measure and mark the length you need on the trim, using a square for an accurate cut. Then, slowly cut the piece with a mitre saw.
- Creating a mitre joint: To create a mitre joint for an inside corner, set your mitre saw to a 45-degree angle. Measure and mark the second piece, then position it against the mitre saw at the marked end. Cut at a 45-degree angle, then fit the two pieces together.
2. Installing Scotia Trim
- Dry fit: Test whether the trims fit by securing them in place before applying adhesive.
- Apply adhesive: Apply a thin, even layer of adhesive to the scotia pieces, covering the entire surface.
- Position the trim: Align it with the wall or floor using a spirit level to ensure it's straight. Press the trim firmly in place to allow it to stick.
- Secure with Nails: Place the nails at regular intervals along the trim, ensuring they are driven at a slight angle for stability. Use a nail punch or a countersinking tool to sink the nail heads slightly below the surface.
3. Filling and Sanding
- Select your filler: Choose a filler that matches the colour of the trim. If you’re using a pre-mixed filler, stir it thoroughly for a consistent texture.
- Fill gaps and holes: Apply the filler to any gaps and holes using a putty knife or a flexible filling knife. Press it firmly into the trim, overfilling to account for shrinking. Scrape any excess material off with the knife.
- Sanding: Once the filler is dry, use a coarse grit sander (80-120 grit) to sand the filled areas. Lightly sand in the direction of the wood grain.
- Intermediate Sanding: Then, move to finer grit sandpaper (180-220 grit) to smooth out the trim.
- Final sanding: Finish with very fine-grit sandpaper (320-400 grit) for a polished surface, avoiding over-sanding.
Choose Mersey Flooring for Your Trimming!
At Mersey Flooring, we pride ourselves on our extensive range of high-quality flooring products, designed for DIY and professional home projects.
We stock a wide range of trimming options at great prices, ideal for various applications and preferences. Contact our expert team for more information.