A Comprehensive Guide to Installing Slat Wall Panels
When your walls look a little bland, there are plenty of ways to add character besides changing paint colour or wallpaper; this is where wall panels come in.
Versatile, eye-catching, and sleek, wall panels look great in both residential and commercial properties. Plus, they’re not as hard to install as you might think!
DIY installations can save you a lot of money if you’re on a tight budget. We’ll show you how simple it is to completely transform a room by changing one aspect.
So, dig out your toolbox and purchase some high-quality slat wall panels; it’s time to breathe life back into your home with our comprehensive guide to installing wood slat wall panels.
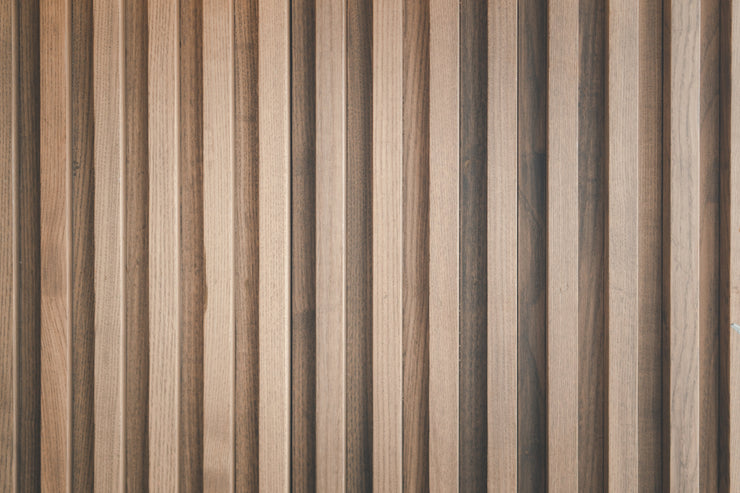
The Versatility of Slat Wall Panels
Slat wall panels are all the rave at the minute in interior design (and we can see why).
Not only are they long-lasting and perfect for creating feature walls, but they can be placed anywhere in the home, from kitchen walls to living rooms and bathrooms.
Plus, you have the choice of installing them horizontally to make your ceiling feel higher and the room more expansive or vertically to create the illusion of more space.
Better yet, you can even hang shelves and hooks on them to decorate the space with picture frames, mirrors, coat hangers—you name it! You can read our blog on creative ways to use slat wall panels for inspiration.
No matter where you plan on installing them, slat wall panels can be installed in various ways. You can choose the best option for you from our guidelines below.
Method 1: Adhesive Installation
This method is perfect for DIY installations and prevents damage to your walls from screws and fixings.
Tools and Materials
- High-strength adhesive for wood
- Slat wall panels
- Measuring tape
- Spirit level
- Jigsaw
- Stanley knife
- Pencil or chalk
- Fine-toothed handsaw or circular saw
- Sandpaper (medium to fine grit)
- Temporary bracing
A Step-by-Step Guide
- Prepare the wall: Clean the surface of your wall to remove any dust, dirt, or old adhesive. Sand any rough areas with sandpaper to smooth out the surface.
- Measure the wall and panels: Starting from the corner of the wall, use a spirit level and measuring tape to measure the length of the wall against your wood panels.
- Plan the layout: Place your panels against your wall to test out the pattern and see if any cuts need to be made for an accurate fit. Use a pencil to mark where the cuts need to be made on the panels.
- Cut the panels: Once you’ve decided on a layout, cut each panel with a handsaw or circular saw. Use masking tape along your cut line to ensure a clean cut. A Stanley knife will suffice for cutting the felt on the back of the panels, and use a jigsaw to cut the panel to fit around any sockets in the wall.
- Apply the adhesive: As you go along, apply the adhesive in a zigzag pattern on the back of each panel, making sure it covers the entire surface for a secure fit.
- Attach the panels: Then, position the panel against the wall and press it against the surface firmly. Starting from the centre and working outward, apply steady pressure to prevent air bubbles from forming. Use painter’s tape or temporary bracing to keep the panel in place while the adhesive sets. Check that the panel is straight with a spirit level.
Method 2: Screw and Plug Installation
This method provides a long-term solution for adding slat panels to uneven walls, high-traffic areas, or load-bearing applications.
The screw and plug method works on masonry, plasterboard, and concrete.
Tools and Materials
- Slat wall panels
- Screws and wall plugs
- Measuring tape
- Pencil or chalk
- Drill and drill bits
- Screwdriver
- Fine-toothed or circular saw
- Hammer
A Step-by-Step Guide
- Prepare the wall: Clean the wall of dust and dirt, and remove any old nails or loose plaster. Make sure there are no wires or pipes where you’ll be drilling.
- Measure and mark: Use a tape measure to measure the length and width of your wall and determine how many panels are needed. Then, use a spirit level to draw guidelines on the wall for where to install the panels.
- Plan and cut: Plan how you want to lay out the panels and if any cuts are necessary. If so, use a fine-toothed or circular saw to cut the panels to the wall measurements. Then, mark where the screws will go on the back of each panel and transfer them to the wall (the screws should go at the edge or centre of the panels and place the screws around 60 cm apart in the felt backing).
- Pre-drill holes: Select a drill bit that’s slightly smaller than the diameter of your screw and use a masonry or wood drill bit to add corresponding holes where the screws will go.
- Insert the wall plugs: For extra grip, select a wall plug suitable for the type of wall material you’re working with and tap it into the pre-drilled holes with a hammer. The plugs should sit flush with the surface.
- Fix the panels: After this, align your panel according to the markings on the wall and the pre-drilled holes to the wall plugs. Then, drill your holes through the felt backing (not the wood panel!) and tighten them with a screwdriver.
Method 3: Batten Frame Installation
If you’re working on weaker walls or you need to hide cables or insulation behind the panels, then adding a batten frame is essential.
Tools and Materials
- Battens
- Slat wall panels
- Wood or masonry screws
- Wall plugs
- Measuring tape
- Spirit level
- Pencil or chalk
- Drill and drill bits
- Screwdriver
- Fine-toothed or circular saw
- Sandpaper
- Hammer
A Step-by-Step Guide
- Measure and plan: Measure the height and width of your wall with measuring tape. Then, mark the batten positions by using a spirit level and pencil to draw horizontal or vertical lines on the wall where the battens will be installed. Space each batten around 30–40 cm apart.
- Prepare the wall: Make sure the wall is clean of any dirt and dust, and check for any wires or pipes before drilling. Mark where the screws will go on the wall so that a screw is stationed at the top, bottom, and middle of each batten.
- Cut the battens: Mark any cuts that need to be made on the battens to fit the wall, and use a fine-toothed or circular saw to cut them to size. Smoothen out the edges with sandpaper.
- Attach the battens: Pre-drill pilot holes every 40-50 cm along the batten with a drill. Use a drill bit that is slightly smaller than the diameter of the screws. Then, align the batten with the markings on the wall. Through the pre-drilled holes in the batten, mark the wall where the screws will go. Use a masonry drill bit for brick or concrete to create pilot holes in each marked point.
- Insert wall plugs: Select wall plugs that match the size of your screws and gently tap them into the pilot holes with a hammer until they sit flush with the surface. This will provide extra stability.
- Secure the battens: Align your battens up with the marked lines and drilled holes. Then, drive screws through the pre-drilled holes in the batten and into the wall plugs. Tighten each screw with a screwdriver for a secure fit. Start with the top and bottom brackets, then fill in the vertical and horizontal sections for a grid framework.
- Insulate or add features: Use the extra space behind the battens to run cables through or add insulation for a soundproof wall.
- Attach the panels to the battens: Now, you can use the first two guides to attach your panels to the battens.
Finishing Touches
Once you’ve selected the right method for you and installed all of your slat wall panels, use wood filler to fill any holes or gaps or add paintable caulk to the gaps between each panel for a neat finish.
We also recommend adding edge trims or mouldings around your panels to create a beautiful, clean border. For a customised finish, paint your wall panels a colour that complements your home and add a sealant to protect the wood from wear and tear.
Now, you can attach any shelves, hooks, or wall hangings and add spotlights or strip lights for a homely touch.
To get started on your home upgrade today, browse our modern, premium slat wall panels. We offer a variety of stunning colours that promise to uplift your home.